Data Merge to Create Double Sided Cards
By Alex White
- 4 minutes read - 758 wordsI've used the data merge feature in Affinity Publisher (and now Affinity 3) before to good effect when creating cards or documents.
But now I found myself with a harder task. What about creating double-sided documents, where the data merge is populating fields on both the front and the back of a set of cards? This is clearly very useful, and equally quite difficult to work out how to do.
Happily I've worked my way through to an answer. It might not be the answer, and if there are better ways of handling it I'd love to hear - come talk to me on Bluesky here https://bsky.app/profile/planesailinggames.com
I want to take you through the following steps.
- Set up master pages
- Set up the data merge
- Make sure that data merge direction is correct
- Structure your CSV in the right way
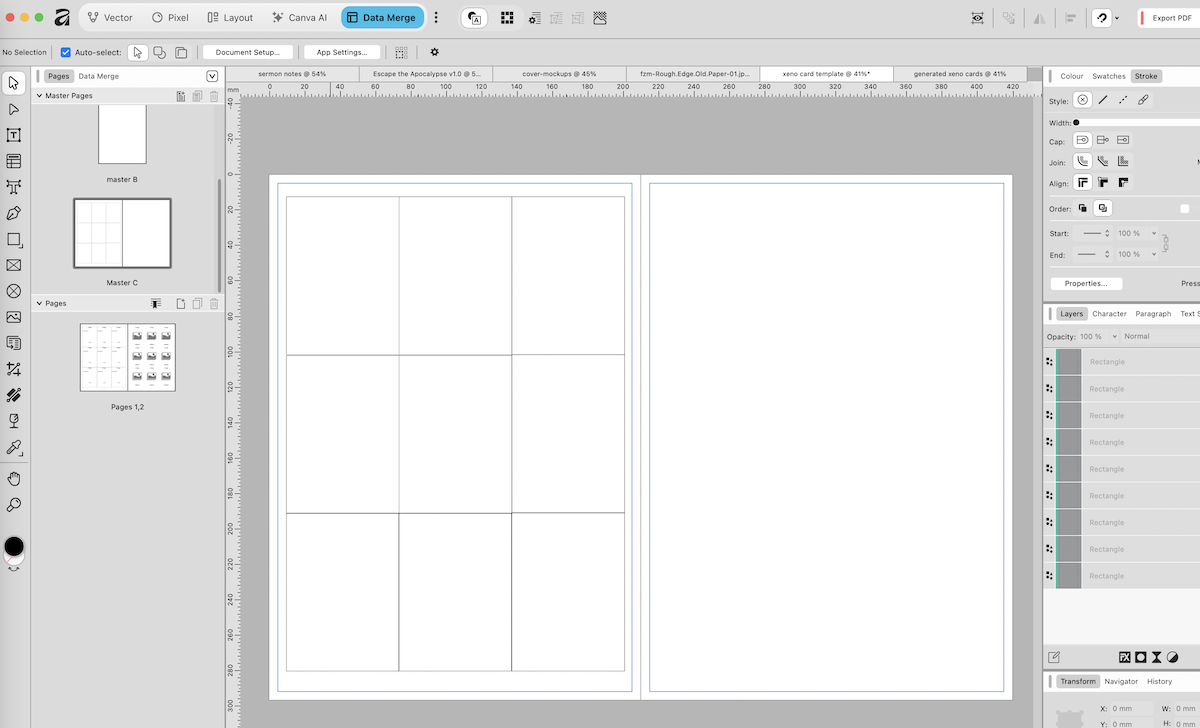
Set up master pages
I always like to use master pages, and I set up a double page spread to use for my cards in this occasion. On the left hand page I put the outline of nine cards (I set these up to be 2.5" x 3.5", one of the standard card sizes). On the right hand side I have the same nine cards but I don't put an outline on them.
An outline on both front and back is asking for trouble when it comes to cutting out the cards (yes, I learned this the hard way). Just put the outlines on one side and you'll be fine.
Set up the data merge
You want to find the data merge tool on the left hand tool bar (see the arrow below). When you have this selected you can drag out a data merge area on your left hand page. Be default it has 2 rows and 2 columns, I changed it to 3 rows and 3 columns.
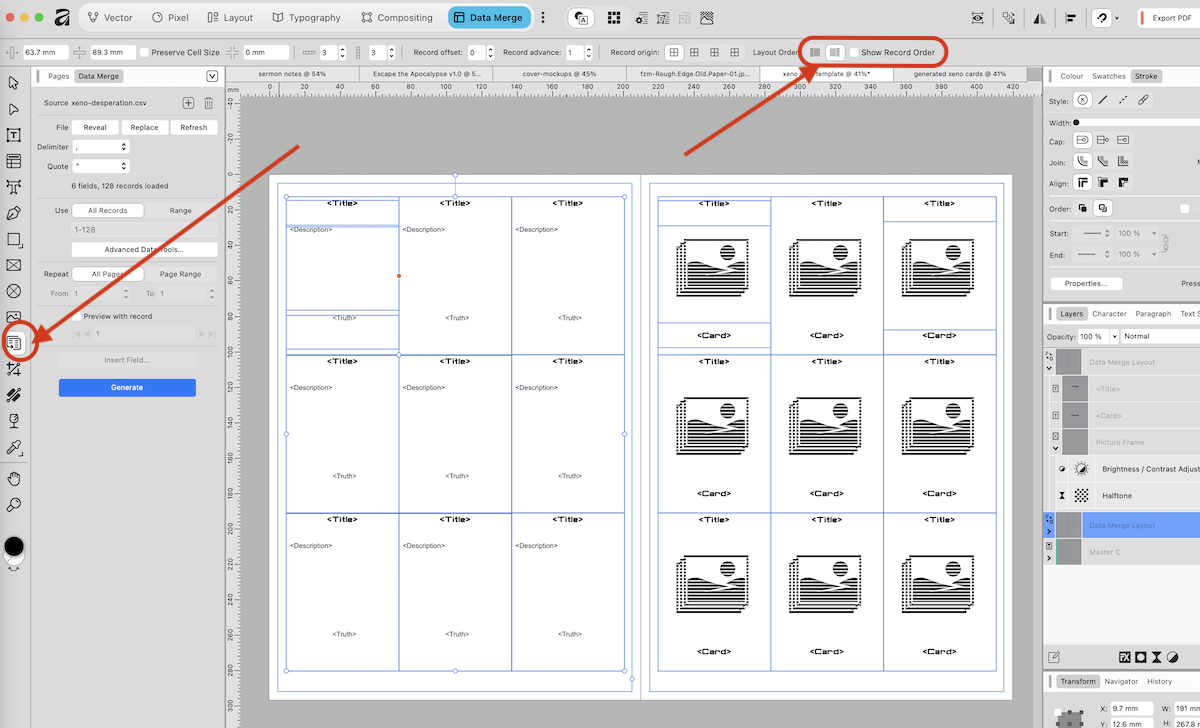
Add text fields to your first card as normal, and see them replicate across the rows and columns. Assign field names to each of these for the merge to take place. There are other videos which give more details on this that I'll link to later.
You can now see that with 'show record order' checked, the data merge cards on the left hand side show the starting position and the order in which the cards are populated with the record information - top three, then middle three, then bottom three, left to right in each case.
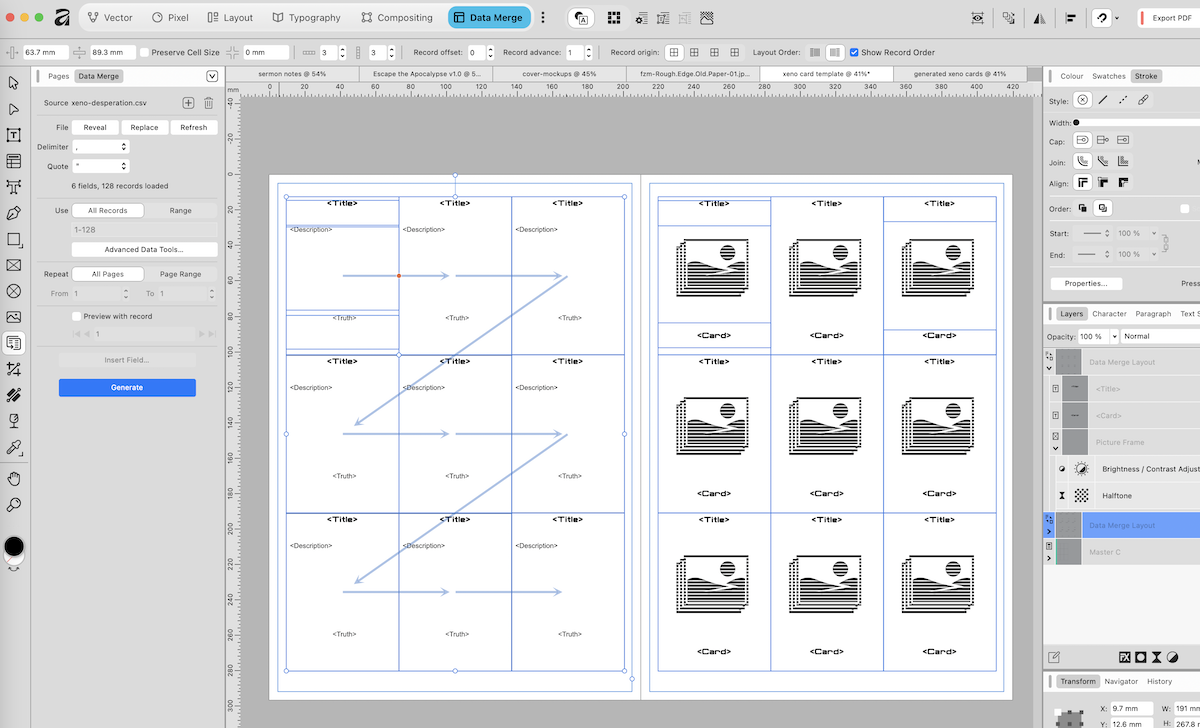
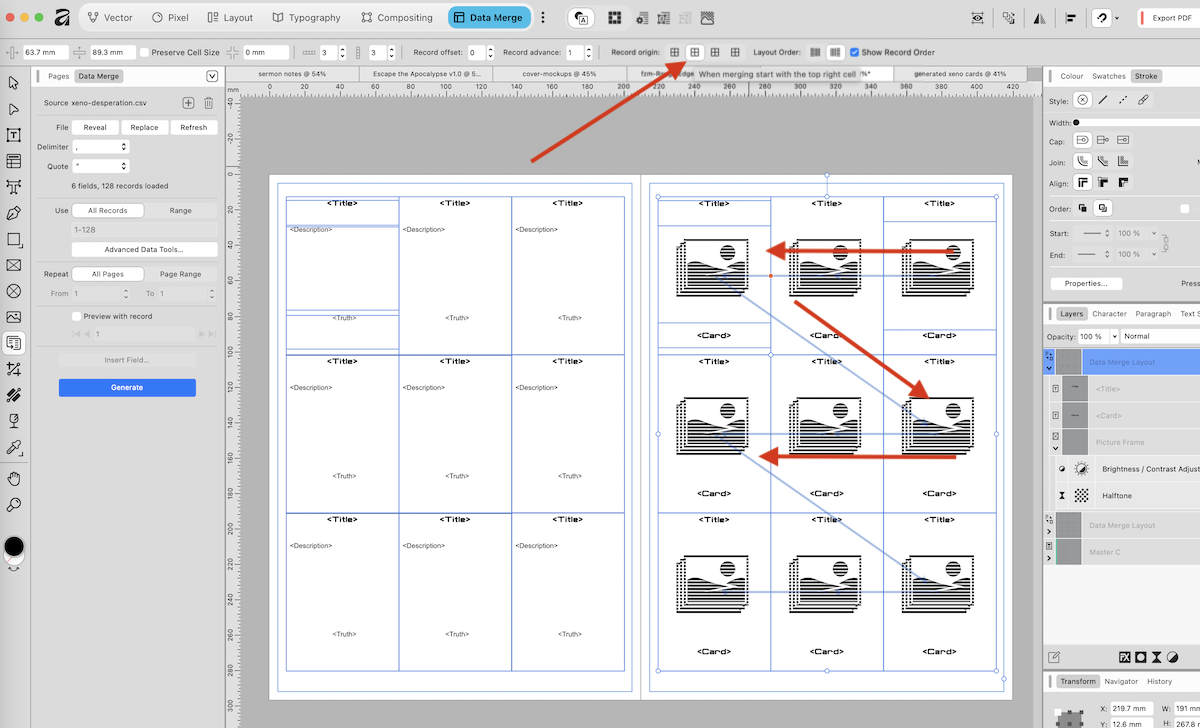
Make sure that data merge direction is correct
Now we click on the data merge for the right hand page, which is the back of my cards. In this case we click on the second of the Record origin icons to start it in top right, and we click on the layout order in order to give us the order indicated - right to left in the top row, then right to left in the middle row, and finally right to left in the bottom row. I've added some big red arrows because the image placeholders make the actual pale blue arrows difficult to read.
This is important because when printing double sided the page is reversed, and we want the related information on the front and back of cards to line up correctly.
Structure your CSV in the right way
I confess that this is the hacky part of the process.
The CSV file (which is easiest to create via a spreadsheet) needs to have two rows (records) for each of the cards which you are producing. Because I have nine cards on a page, I have nine rows with a set of data for the front of the card, then another nine rows for information for the back of the card.
I could have completely duplicated the information, but I found it easier to leave fields blank if they are not being used on the front or back respectively.
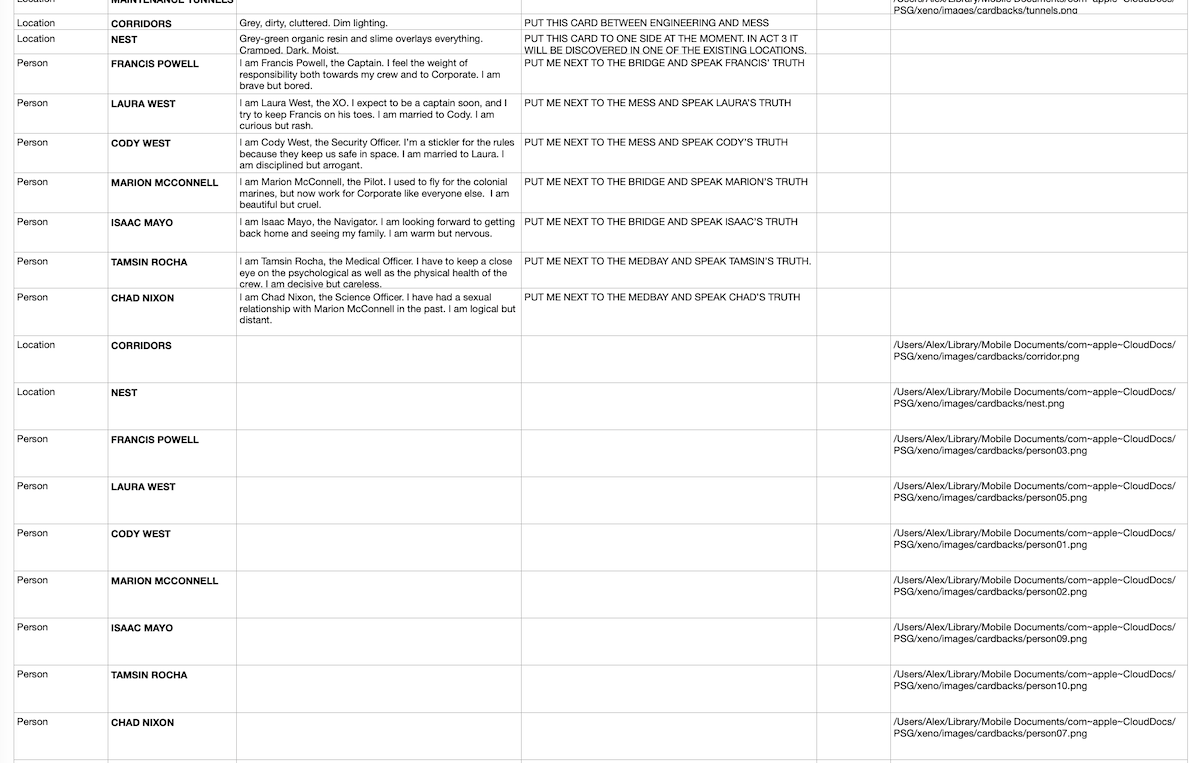
The Final Article
Here is a screenshot of the generated document with all data merged in from the CSV. As you can see there are seven people and two locations. I've used temporary dummy photos for illustrative purposes here.
You can see that the page imposition is going to work correctly when you look at the first row and see that "Francis Powell" has a picture that will match up with his description when the page is printed double sided.

I hope you found this useful, please share if you do!
A video which goes through the basics of data merge on the current version of Affinity can be found here: